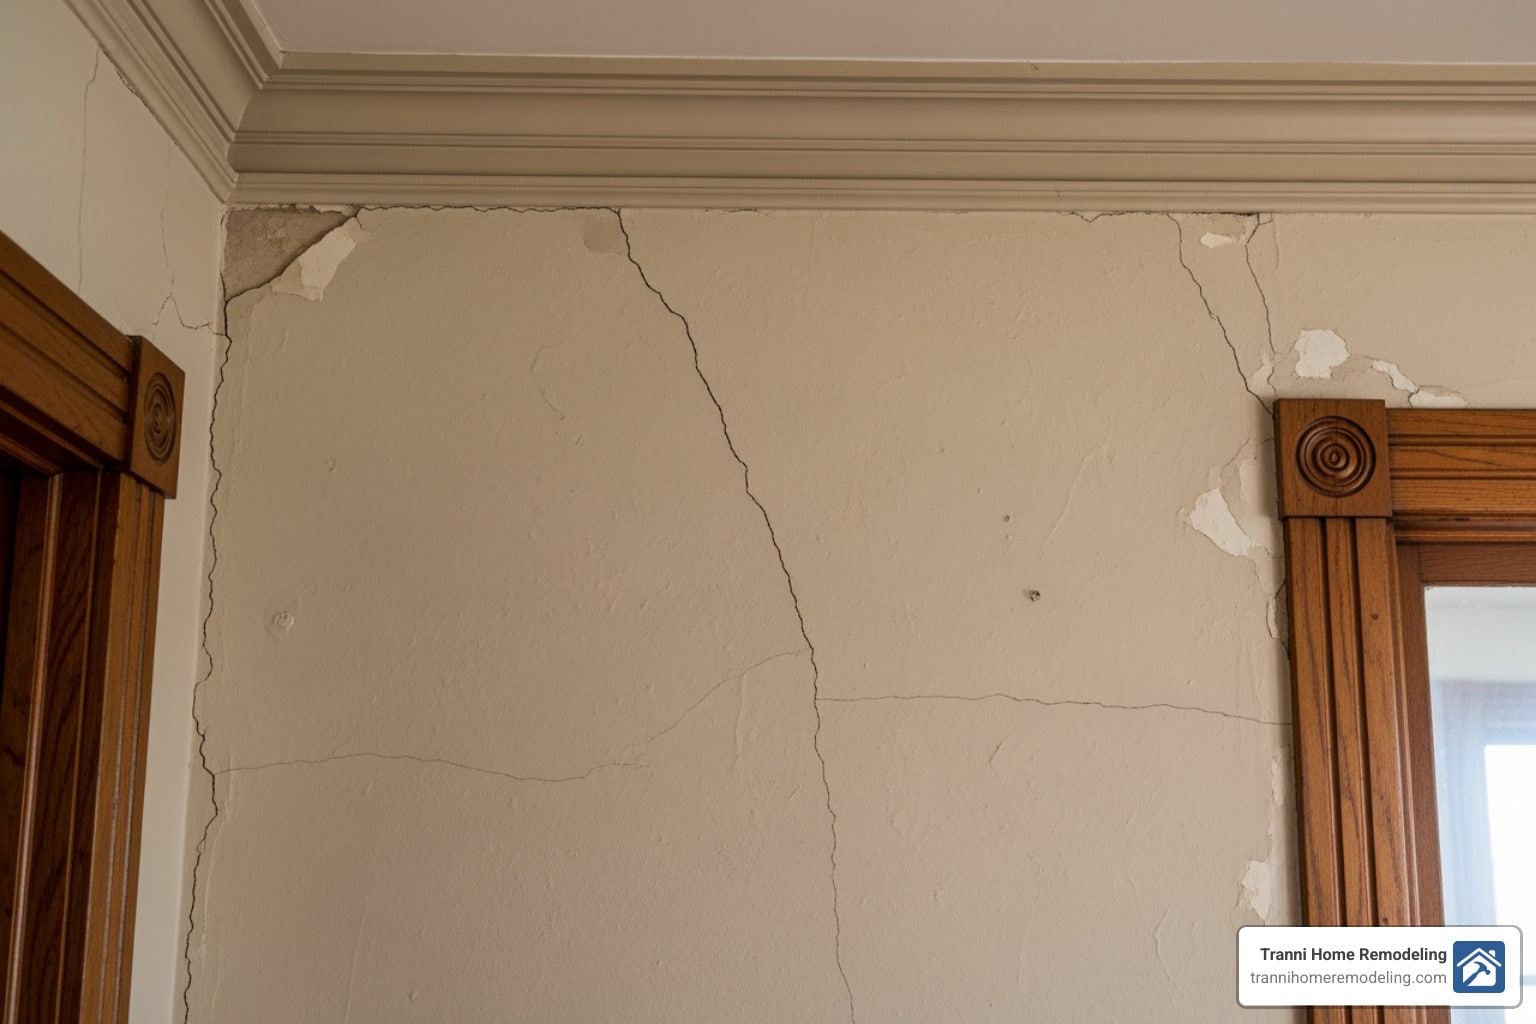





Why Home Plaster Repair Matters for Your Historic Walls
Home plaster repair is a common challenge for homeowners living in older properties, where walls naturally develop cracks, chips, and loose sections over time. The good news? Most plaster damage is cosmetic and fixable with the right approach.
Quick Overview: Home Plaster Repair Essentials
- Minor hairline cracks – Usually cosmetic from house settling, easily filled with joint compound
- Wide cracks (1/4 inch+) – May indicate structural issues requiring professional assessment
- Loose or bulging plaster – Needs reattachment to underlying lath with adhesive and screws
- Basic repair steps – Score crack, clean debris, fill with plaster compound, sand smooth, prime and paint
- Safety first – Test for asbestos if home built before 1980; 2% of plaster contains asbestos
Plaster walls offer something drywall simply can’t match: superior soundproofing, fire resistance, and that seamless, timeless aesthetic that adds character to any home. Unlike modern drywall, traditional plaster consists of multiple layers applied over wooden or metal lath, creating incredibly durable surfaces that have stood the test of time for decades or even centuries.
The catch? When plaster does crack or come loose, the repair process requires a slightly different approach than fixing drywall. House settling, temperature fluctuations, moisture intrusion, and simple age all contribute to the inevitable wear that shows up as hairline fractures around windows, diagonal cracks near corners, or sections that sound hollow when tapped.
Understanding when to tackle repairs yourself versus calling in a professional can save you both time and money. Small cosmetic cracks are straightforward weekend projects, while structural issues or large damaged areas warrant expert evaluation. The key is correctly diagnosing the damage before you start any repair work.
As Tyler Tranni, owner of Tranni Home Remodeling in Billerica, I’ve worked on countless home plaster repair projects across New England, from simple crack fills to full wall restorations in century-old homes. My team and I understand the unique challenges these beautiful historic surfaces present and the proper techniques to restore them without causing further damage.
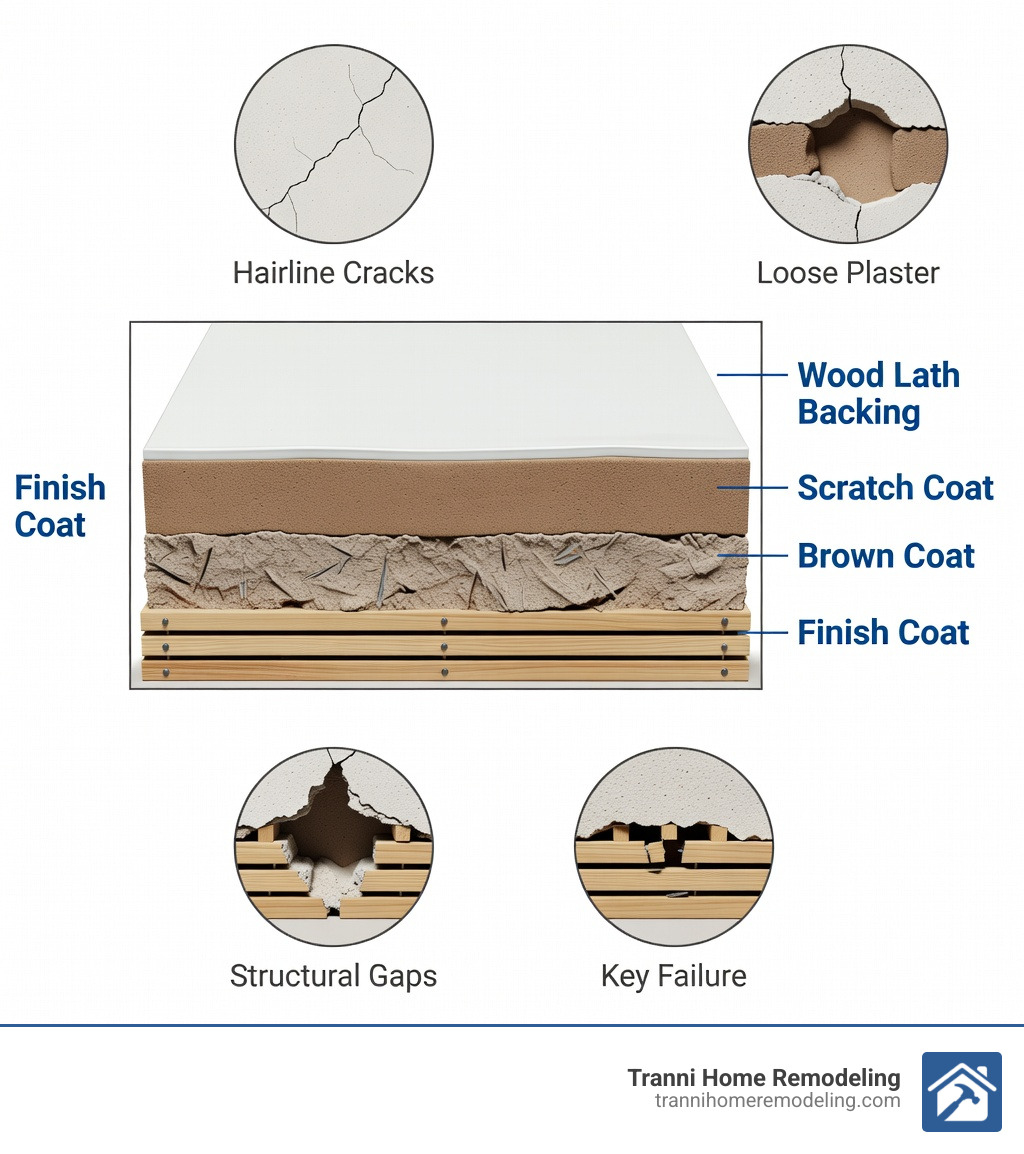
Home plaster repair terms to know:
Diagnosing Damage: Cosmetic vs. Structural Issues
Before you grab a putty knife, you need to play detective. Not all cracks are created equal. In our experience working throughout Middlesex County, we see everything from tiny spiderwebs in Winchester to major shifting in older Andover estates.
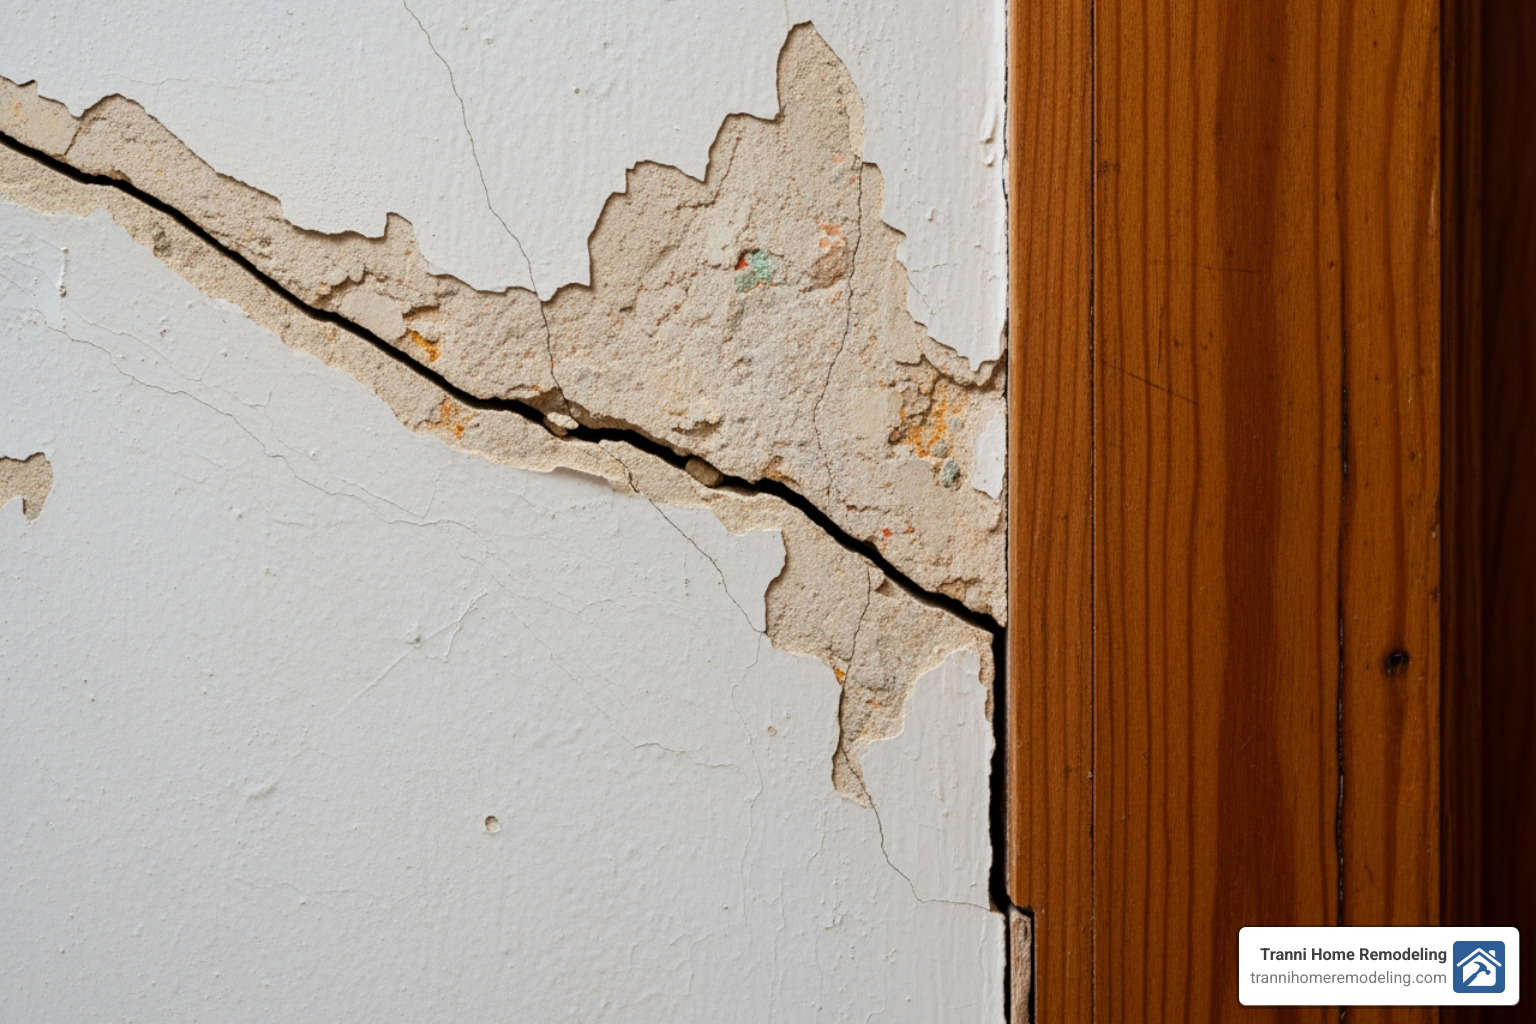
Most cracks are the result of natural house settling. Houses are living things; they breathe, expand, and contract. This movement is often triggered by our lovely New England weather—humid summers followed by bone-dry winters. However, some cracks are red flags.
How to Tell the Difference
A simple hairline crack is usually just a sign of age. But if you see a diagonal crack stemming from the corner of a door or window that is wider than 1/4 inch, your house might be telling you about a foundation issue.
Another major sign of trouble is “bulging.” If a section of the wall looks like it’s holding its breath, the plaster has likely detached from the wooden lath behind it. You can test this by gently tapping the wall. A solid “thud” is good; a “hollow” sound means the keys (the plaster that squeezed between the lath strips to lock it in place) have snapped off.
| Feature | Cosmetic Hairline Crack | Structural Issue / Subsidence |
|---|---|---|
| Width | Less than 1/16 inch | 1/4 inch to 1 inch+ |
| Direction | Random, spiderweb, or vertical | Diagonal (stair-step) or horizontal |
| Location | Anywhere on the wall | Corners of doors, windows, or ceilings |
| Sound | Solid when tapped | Hollow or “crunchy” |
| Movement | Static | Grows over time; doors/windows stick |
If you notice these more severe signs, it’s worth looking into structural wall issues before simply covering them up.
Essential Tools and Safety for Restoration
If you’ve decided the damage is manageable, it’s time to gear up. Home plaster repair isn’t necessarily expensive, but it does require specific materials to ensure the patch doesn’t just pop out in six months.
The DIY Plaster Repair Kit:
- 4″ Putty Knife: Perfect for spreading compound without feeling like you’re wielding a broadsword.
- Utility Knife: For “scoring” or widening the crack (more on that later).
- Joint Compound: Premixed is easier for beginners, but powdered (setting-type) shrinks less.
- Plaster of Paris: Great for deep fills because it sets rock-hard and doesn’t shrink.
- Sanding Block: Medium and fine grit.
- Vacuum with HEPA filter: To keep the dust from taking over your life.
Safety Precautions for Home Plaster Repair
Safety isn’t just a buzzword; it’s a necessity when dealing with older homes in towns like Lexington or Concord. Research shows that about 2% of plaster contains asbestos, which was often added to help the mixture cure faster. If your home was built before 1980, there is a risk.
Always wear a P100 respirator (not just a basic paper mask) when sanding or scraping. Dust suppression is key—mist the area with water to keep particles from becoming airborne. Furthermore, be mindful of lead paint, which is common in many historic Massachusetts homes. For more detailed guidance, you can check expert advice on plaster safety.
Necessary Materials for Lath and Plaster
For those “hollow” walls we mentioned, you’ll need more than just mud. You need to mechanically reattach the plaster to the wood.
- Plaster washers: These thin, perforated metal disks help “clamp” the plaster back to the lath.
- 3/16″ Masonry Drill Bit: For drilling pilot holes without cracking the surrounding plaster.
- PVA Glue (like Elmer’s): Mixed 50/50 with water, this acts as a bonding agent.
- Construction Adhesive: A high-quality adhesive like Loctite Power Grab can be used to “glue” the wall back together.
For larger projects where the structural integrity is in question, you might want to look into interior-plastering-services to ensure the job is done right the first time.
Step-by-Step Guide to Home Plaster Repair
Ready to get your hands dirty? Here is the process we use at Tranni Home Remodeling to ensure a seamless finish.
1. Prepare the Crack (The V-Groove Technique)
It sounds counterintuitive, but to fix a small crack, you usually have to make it bigger. Use the corner of your putty knife or a utility knife to “score” the crack, turning it into a V-shaped groove. This creates more surface area for the new plaster to bond to. Vacuum out all the loose crumbs and dust. If you skip this, your patch is just sitting on a layer of dust—and it will fall out. Read more about plastering-repairs-wall for specific wall prep tips.
2. Reattaching Loose Plaster to Lath
If the wall feels bouncy or hollow, you need to secure it before filling.
- Drill: Use your masonry bit to drill pilot holes every 3-4 inches along the crack, making sure you hit the wooden lath behind the plaster.
- Inject: Use a syringe to inject your 50/50 PVA glue/water mixture into the holes. This congeals the old dust and prepares the surface for adhesive.
- Glue: Squeeze construction adhesive into the holes.
- Clamp: Place a plaster washer over the hole and drive a screw through it into the lath. This “clamps” the plaster back against the wood. Let this cure for 24 hours.
If this sounds like a lot of work, don’t worry—many homeowners in Burlington or Reading prefer to use professional-plastering-services for this stage to avoid accidentally cracking the wall further.
3. Filling and Finishing the Surface
Once the wall is stable, it’s time for the “mud” work.
- Scratch Coat: Apply a thin layer of plaster or joint compound, pressing it firmly into the V-groove. If the hole is deep, “scratch” the surface of this wet layer with a nail to give the next coat something to grab.
- Brown Coat: Apply a second layer to level the surface.
- Finish Coat: This is the thin, smooth layer. Pro tip: Mix a little water into your joint compound to give it a “soft-serve ice cream” consistency. This makes it much easier to smooth out.
- Sanding: Once dry (usually 24 hours), sand lightly. Don’t over-sand, or you’ll expose the tape or washers!
For those on a budget, these affordable-plastering-services techniques can make a world of difference in your home’s appearance.
Professional Restoration and Maintenance
Once your walls are smooth again, you want them to stay that way. Home plaster repair is often a symptom of environmental factors.
Prevention and Maintenance
- Humidity Control: Use a dehumidifier in the summer and a humidifier in the winter. Keeping your home between 30% and 50% humidity prevents the wood lath from shrinking and expanding too much.
- Foundation Inspections: In areas like Woburn, MA or Burlington, MA, older foundations can shift. Keep an eye on your basement for new cracks.
- Wall Anchors: Never nail directly into plaster for heavy pictures. Use toggle bolts or specialized plaster anchors to distribute the weight.
Cost Estimates for Home Plaster Repair
What should you expect to pay? Based on average internet data, professional plaster repair costs can vary wildly depending on the extent of the damage. Note: These are industry averages and not actual quotes for Tranni Home Remodeling.
- Small Crack Repair: $150 – $450
- Single Wall Stabilization (Washers/Adhesive): $500 – $1,200
- Full Room Restoration: $2,500 – $7,500+
Whether you are in Chelmsford, MA or Carlisle, MA, the high end of pricing often reflects the labor-intensive nature of historical restoration, where every “key” must be manually replaced.
When to Hire a Specialist
Sometimes, DIY just won’t cut it. You should definitely call drywall-and-plaster-contractors if:
- The damage is on a ceiling (gravity is not your friend here).
- There are large structural gaps wider than 1/2 inch.
- You have decorative crown molding or medallions that need repair.
- You suspect a major water leak is behind the damage.
Frequently Asked Questions
How can I prevent future plaster cracks?
The best defense is a stable environment. Maintain consistent indoor temperatures and manage humidity. Also, ensure your gutters are clear; water pooling near your foundation in Billerica, MA can cause the ground to shift, leading to wall cracks.
Is Plaster of Paris better than joint compound?
They serve different purposes. Plaster of Paris is a gypsum-based product that sets very quickly and does not shrink, making it ideal for deep holes. However, it’s hard to sand. Joint compound (or “mud”) is much easier to sand to a feathered edge, making it better for the final finish coat. Many pros use a plastering-and-painting “hybrid” approach, using plaster for the base and compound for the top.
Can I repair plaster with drywall tape?
Yes, but use paper tape for the best results. Fiberglass mesh tape is easier to apply because it’s sticky, but it’s thicker and harder to hide on a smooth plaster wall. Paper tape provides a stronger reinforcement against future cracking.
Conclusion
Plaster walls are a treasure, providing a level of quality and character that modern materials just can’t replicate. While home plaster repair might seem daunting, taking it step-by-step—or knowing when to call in the experts—will keep your home looking its best for the next century.
At Tranni Home Remodeling, we pride ourselves on high-quality craftsmanship and outstanding service. Whether you’re dealing with a “wee cave-in” or just some annoying hairline cracks, our team of Billerica-based renovation experts is here to help.
Ready to restore your home’s beauty? Schedule your professional plastering and painting services with Tranni Home Remodeling today!